
My Kitchen Renovation: All The Details Of My Dream Kitchen!
I am so excited to finally share all the details of our kitchen renovation! I have been so pleased with the results and am thrilled to share them with you all. From the details of my marble countertops to the paint colors I chose to my favorite accessories and so much more, I am sharing all the ins and outs!
If you have been following along with Family Savvy on Instagram for some time, you have probably seen me talking about my kitchen renovation! We started the process in July of 2022 and wrapped it up in November 2023! I learned so much along the way and am so thrilled to share the details with all of you!
Why Did You Decide to Renovate?
As Family Savvy has grown over the years, I have spent more and more time in our kitchen! It is my primary workspace and the backdrop to nearly all my Family Savvy content, so I wanted a lighter and brighter setting. I also love to entertain and wanted a space more conducive to hosting and cooking for large groups of people. Overall, my primary goal in this renovation was to tailor the space to our lifestyle, maximize kitchen storage, and have the best setup for cooking and entertaining!
Did You Start Fresh or Build off What You Had?
When we first started the process, we were trying to work around the existing layout of the kitchen. We looked at “refacing” cabinets to look nicer and also at extending upper cabs to the ceiling. Soon into the process, we realized that we wanted to just tear out and start afresh. We tore out everything from cabinets to countertops to appliances and built our dream kitchen from the ground up! This allowed us to totally customize the kitchen design and every feature, and we could not be happier with the results.
What All Did You Change?
To sum it up, everything! Because we started from a clean slate and did a complete renovation, the kitchen feels like a totally new space. I will break down all these changes in further detail, but for a quick overview, here is a list of everything we added or changed:
- Larger island with storage in the base
- Marble on the island and countertops
- Marble mosaic on the backsplash
- New custom kitchen cabinets, drawers, and pullouts with new hardware
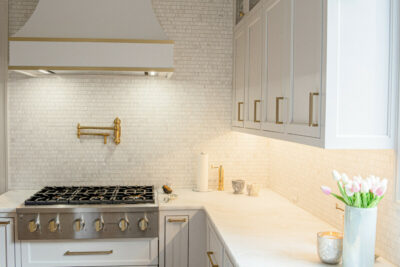
- Added a range-style cooktop with a custom hood
- Built an appliance garage
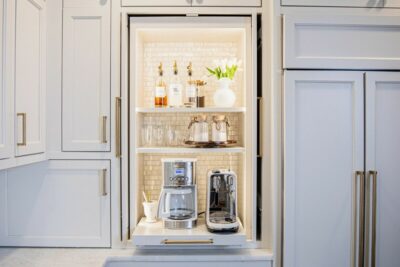
- Built a coffee station
- Repainted the walls and kitchen island
- Installed a new sink
- Built a walk-in pantry
- Installed a new double monogram oven with French doors
- Added a brass pot filler
- Reworked our outlets to avoid dangling cords
- Added dimmer features on all our lights
- Installed new lighting fixtures

What Marble Did You Choose?
I worked with Merry Margaret from Surface One Pelham to pick out countertop material for our renovation. She encouraged me to go with marble, and I am SO thankful! I love it!!! I chose honed Bianco Rhino marble for our countertops and also for the island. We purchased our backsplash – Artistic Tile split joint dolomite from Triton Stone Group. My countertops are a honed marble, which means it is a smooth matte finish while our backsplash is a polished finish.
Why Did You Choose Marble? Would You Do It Again?
Before we renovated, we had quartz countertops in the kitchen. The quartz was so durable and served us well, especially when we had kids at home! However, I have always loved the look of marble countertops and knew it was something I wanted to bring into my own kitchen one day. I have always heard so many mixed opinions about all marble countertops, but I can truly say I am so in love with the results and haven’t looked back! There is nothing that will match the elegance or beauty of marble, in my opinion. I would say if you are on the fence, get the marble! You will love it. It is so timeless and classically beautiful.
How Do You Maintain Your Marble Countertops?
Cleaning my marble counters has actually been pretty simple! I just use warm sudsy water and a microfiber cloth. The KEY to keeping marble looking its best is to wipe up spills or stains immediately. It is that easy!!! My marble is white with muted gray veining. It still looks as good as it did when first installed.
Watch Me Clean My Marble Countertops:
How Did You Optimize Space and Storage in Your Kitchen?
My priorities for the renovation were not only aesthetic but also functional! Optimizing my space and storage for cooking and entertaining was extremely important to me and has made the biggest difference in my day-to-day use of the kitchen! These changes and storage solutions have made cooking and using my kitchen a more efficient, enjoyable experience:
- I chose inset cabinets that reached the ceiling- our previous cabinets were overlaid and didn’t reach the ceiling. The new cabinetry has made a huge difference aesthetically but also has given us extra storage space.
- We built an appliance garage – It is SUCH a joy to be able to hide the appliances you use often but still have easy access to them. We keep our Vitamix and electric can opener in ours.
- We built a coffee station with sliding pocket drawers that fold into the wall for a lovely aesthetic when left open. The coffee station is where we keep our coffee makers, tea kettle, coffee cups, and teas.
- We added large drawers near the stove for frequently used items like pots, pans, and cooking utensils.
- We installed a large sink to avoid dish clutter.
Watch Me Share My Tips For Cabinetry:
Lighting Tips For a Kitchen Remodel:
Lighting fixtures and details absolutely bring a space together and take it to the next level! These are some ways we optimized lighting to add warmth and ambiance to our space:
- We had our electrician put every lighting on a dimmer. Being able to adjust every light in our house with the dimmer is fabulous for creating ambiance, especially when hosting!
- We put string lights under the counter to showcase the backsplash marble.
- We added automatic turn on lighting in the coffee station.
- We had our electrician put our outlets low and to the side to avoid hanging cords.
How Did You Add Touches of Warmth?
I favored a light, bright aesthetic so everything from the marble countertops and backsplash to our cabinets to our paint colors is white. The island is blue, which adds a pop of color. This suits my own interior style but also makes the best backdrop for filming in my kitchen. To add touches of warmth and “glam” to balance all the white in our renovation, I included plenty of gold accents throughout! These are some of the places I added gold accents, which made a huge difference in the overall feel of the kitchen:
- I added a touch of gold to the custom hood over my stove
- I chose an unlacquered brass pot filler
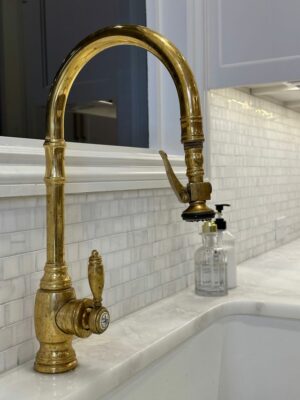
- I chose a brass faucet over the kitchen sink
- For hardware, I chose satin brass pulls and knobs
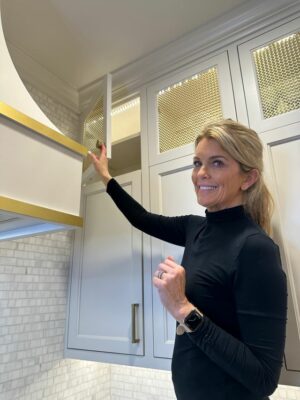
- We used a gold decorative mesh instead of glass on the top of our kitchen cabinetry
- I chose gold and brass lighting fixtures
- We added gold knobs on the cooktop
- I accessorize my kitchen with pops of color- mostly in a silvery blue
Five of My Favorite New Kitchen Details:
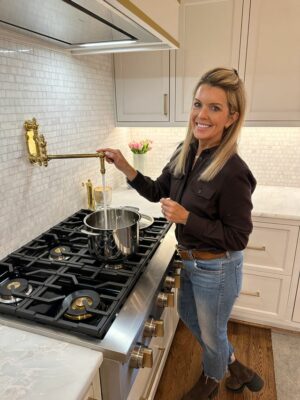
- My gold brass pot filler- I installed this mainly because I loved the aesthetics of it, but I was not expecting to appreciate the functionality so much! It is so convenient to fill up heavy pots right at the stove rather than lugging them back and forth to the sink.
- Range style cooktop- I love the gold accents of this cooktop and that the dials are at the front of the stove instead of on the top.
- Slim pullout drawers- These make storing spices, oils, and vinegars a breeze!
- Large utensil drawer under the stove- I use these to fit all my most frequently used cooking utensils. I’ve been shocked by how much this cuts down on my cooking time!
- Large drawer for pots under the stove- I love having all my pots and pans in one place, with the lids stored separately. This has been an organizational game-changer!
Contacts and Resources:
- Triton Stone Group
- Surface One Pelham
- Merry Margaret (from Surface One): merrymargaret@surface1.com, @merrymargaret52 (contact for marble)
- Cabinet Hardware and Kitchen Lighting
- Gold Mesh on cabinets (Kent Design Wire 286S in Satin Brass)
– order through Renee at Restoration Hardware - Bianco Rhino Marble countertops – for Jamie’s kitchen and bathroom
- Backsplash tile- Artistic Tile Split Joint Dolomite
- Wall paint color- Origami White
- Island paint color- Monorail Silver
- Shop my hardware
- Shop my lighting
- Shop pot fillers
- Shop my coffee bar essentials
-
The Changes in My Kitchen Renovation That Made the Biggest Impact
-
My Advice For Anyone Considering Kitchen Remodel Projects:
My number one piece of advice for anyone starting their own renovation project is to trust the process! Custom projects can feel like a daunting task because they take a very long time and are hard to rush. There is no “quick fix,” but know that you will ultimately be so in love with the results, and be patient in the meantime! A remodel will completely change the feel of your kitchen, and creating a more beautiful, functional kitchen is a game-changer!


